FRP Bypass [2026 Updated]
FRP (Factory Reset Protection) is an Android security feature that asks for the previously synced Google account after a reset. This page explains why Google verification appears, what authorized recovery paths exist, and how to evaluate common tool categories safely in 2026.
Shortcuts
These are commonly referenced app-entry labels seen across FRP troubleshooting discussions. Availability varies by Android version, OEM skin, and patch level.
Get the Apk’s or Add-ons
Download files only from trusted sources and verify exact file names before opening. If Android prompts for “Install unknown apps,” allow it only for the current installer app and disable it again afterward.
FRP Bypass Google Account (2026 Methods & 2024 Shortcuts)
This section summarizes common recovery paths used by authorized device owners. Older methods from 2024 may still appear online, but compatibility in 2026 depends heavily on model, firmware, and security patch.
Without PC for Every Android Mobile and Tablet
Some users prefer on-device recovery attempts when no computer is available. In practice, success rates vary and many newer builds require updated workflows. Always prioritize official account recovery and authorized support channels first.
Your existing screenshot step blocks (Step 1–19)
Keep your screenshots and step cards in place, but replace action text with neutral checkpoint language like this:
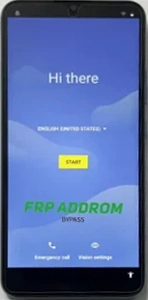
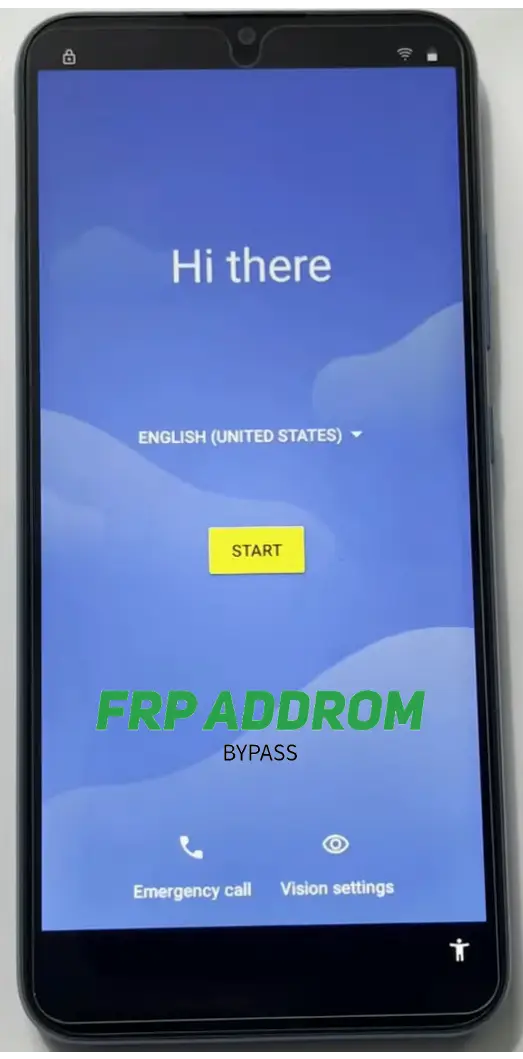
Step 1 — Initial setup checkpoint
Confirm language, region, and network setup screens are loading correctly.
Step 2 — Input/accessibility checkpoint
Verify input and accessibility options are visible on your device build.
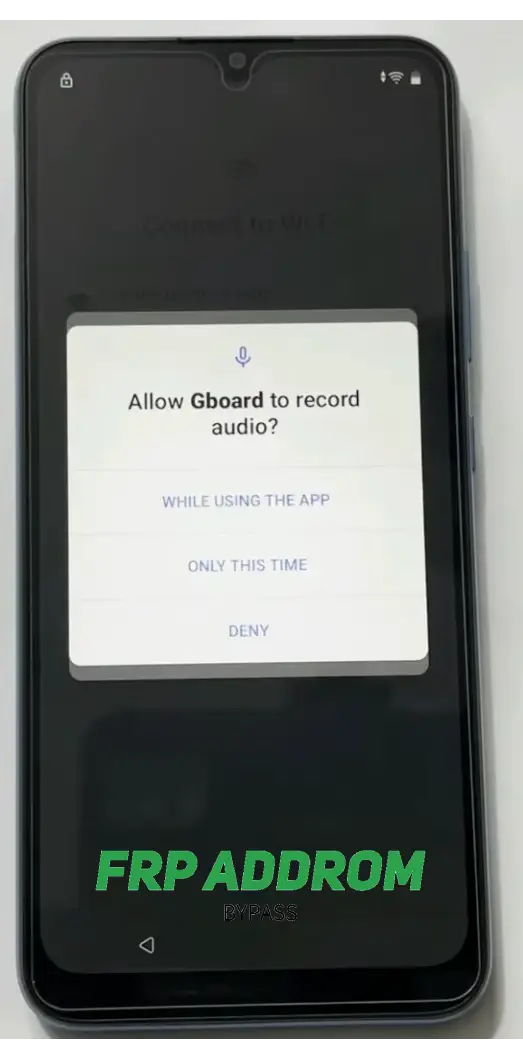
Step 3 — Permission prompt checkpoint
Review permission prompts carefully and proceed only if you understand why access is requested.
Step 4 — Repeatability checkpoint
If a menu path fails, stop and re-check model-specific guidance for your firmware.

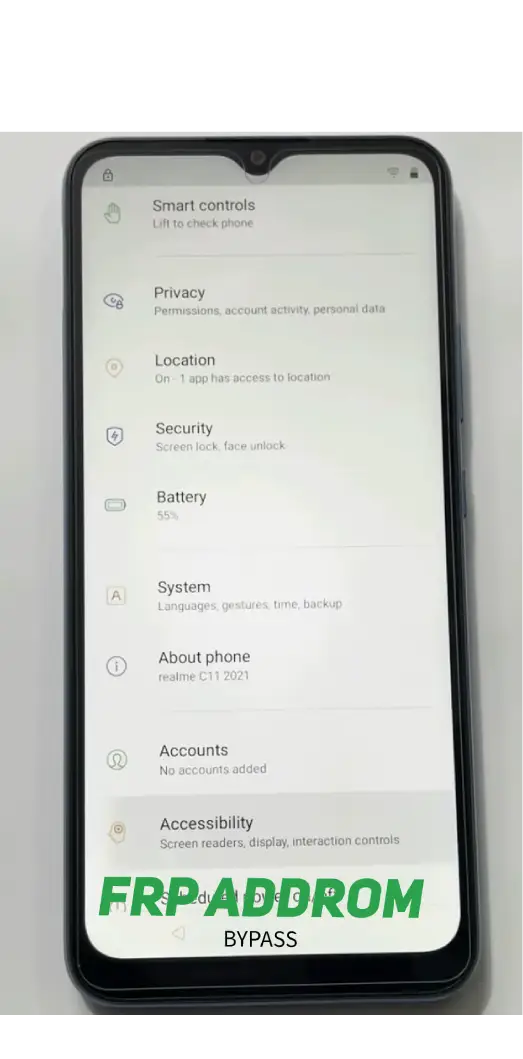
Step 5 — App info/settings checkpoint
Confirm you are viewing the correct app/system settings page for your device variant.

Step 6 — System apps visibility checkpoint
On some devices, system apps are hidden by default; menu labels differ by OEM.

Step 7 — Core services checkpoint
Do not disable critical services unless explicitly instructed by official support.

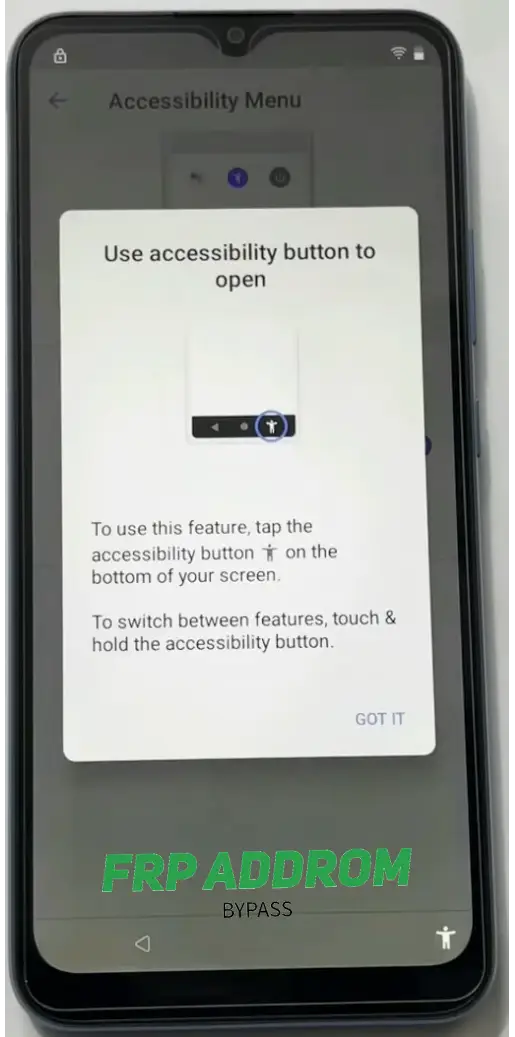
Step 8 — Accessibility menu checkpoint
Accessibility behavior differs across Android versions; verify options match your build.
Step 9 — Setup flow checkpoint
Return to setup flow and confirm state changes without forcing unsupported actions.
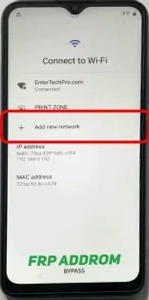
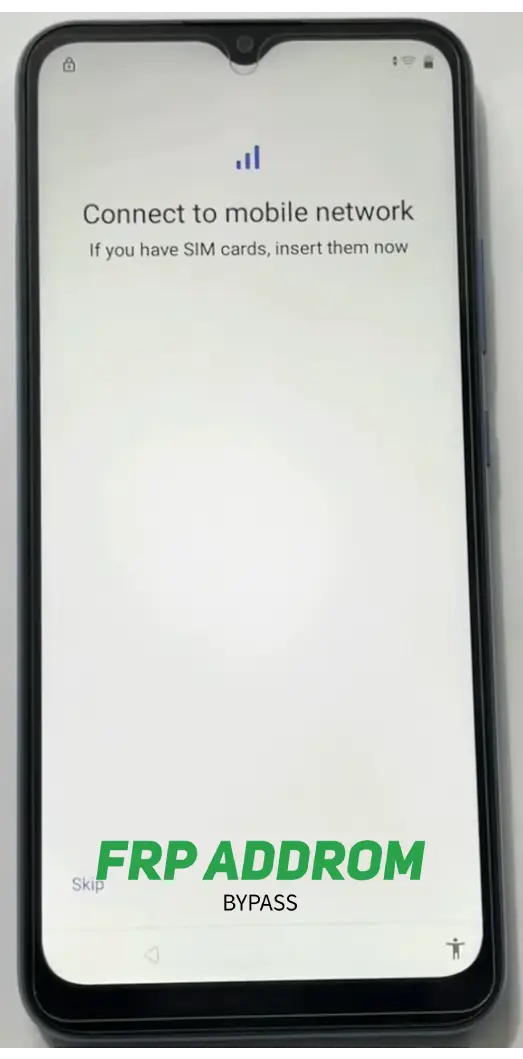
Step 10 — Network step checkpoint
Document current setup screen state before moving forward.

Step 11 — Assistant/update checkpoint
If update checks loop, verify internet stability and firmware integrity first.

Step 12 — Retry checkpoint
If a path doesn’t open, avoid repeated random taps; re-check version-specific guidance.
Step 13 — Offline/setup options checkpoint
Setup options can vary by carrier, region, and security patch.
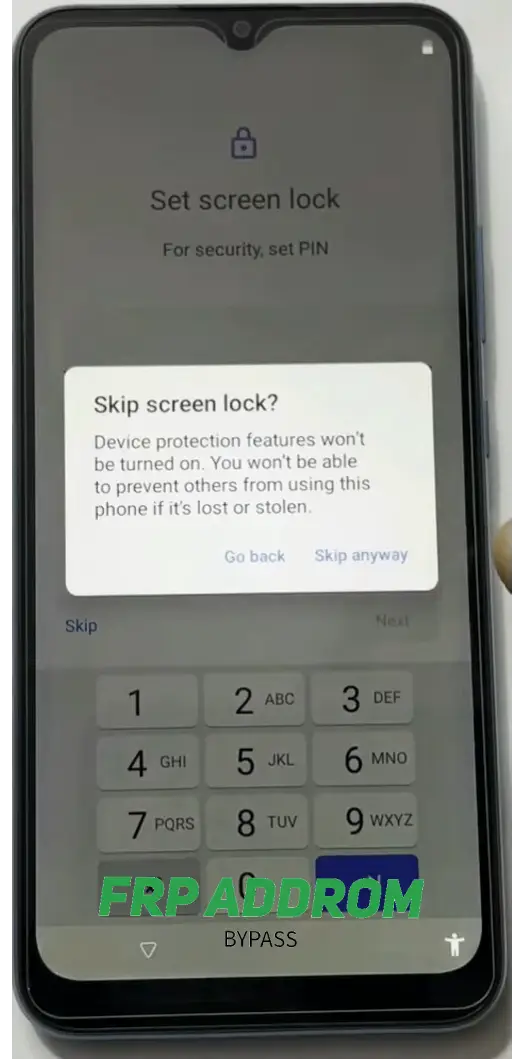
Step 14 — Lock screen/setup checkpoint
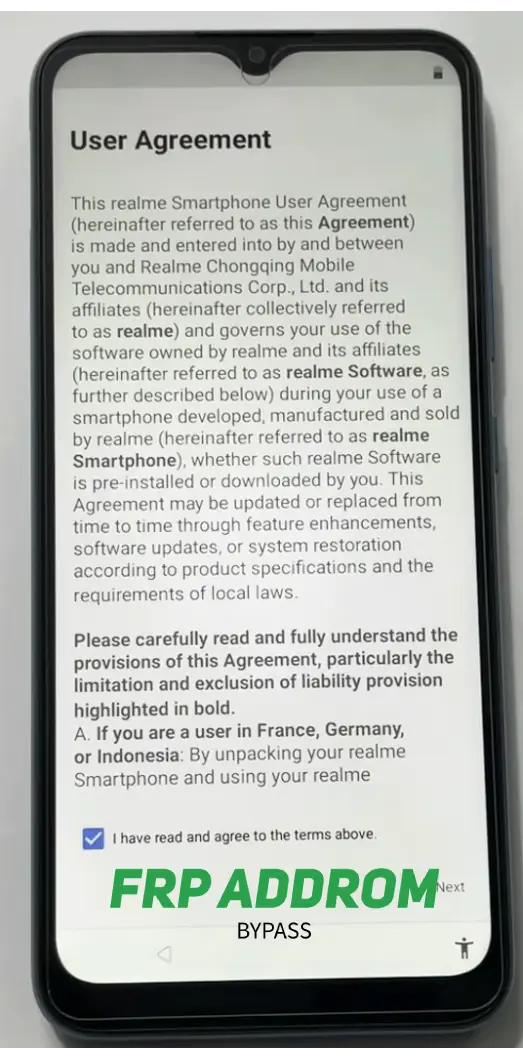
Review each prompt before accepting; preserve data and security settings where possible.

Step 15 — Developer settings checkpoint
Only advanced users should modify developer options; incorrect changes can cause instability.

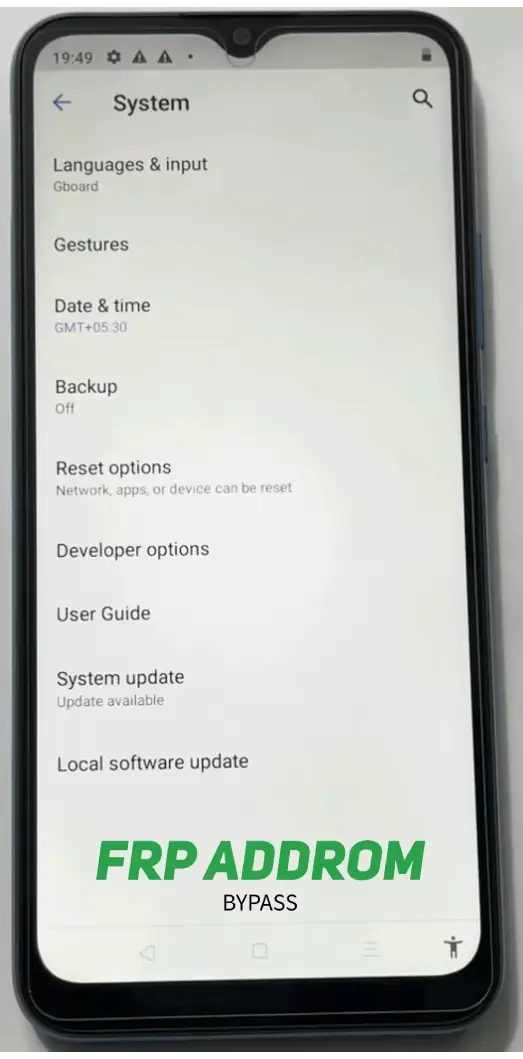
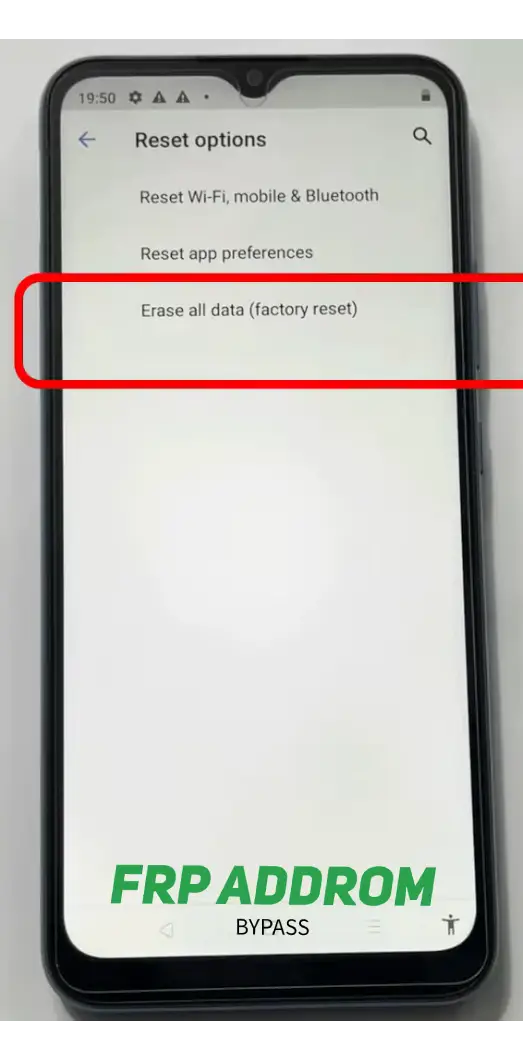
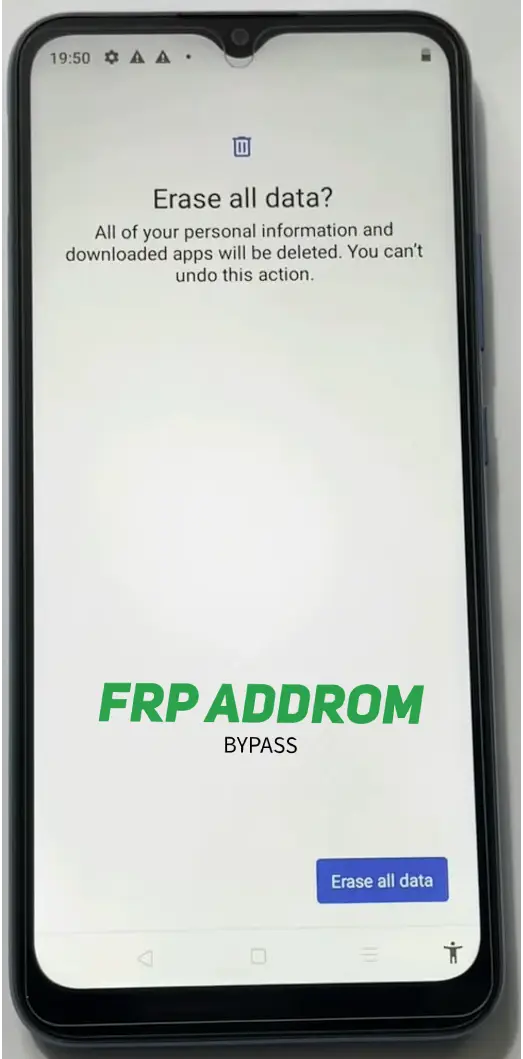
Step 16 — Reset options checkpoint
Reset actions can erase data. Back up first and confirm authorization before any reset.

Step 17 — Reboot/setup checkpoint
After restart, verify setup integrity and account status carefully.
Step 18 — Verification checkpoint
Confirm whether Google verification behavior changed and document exact on-screen prompts.
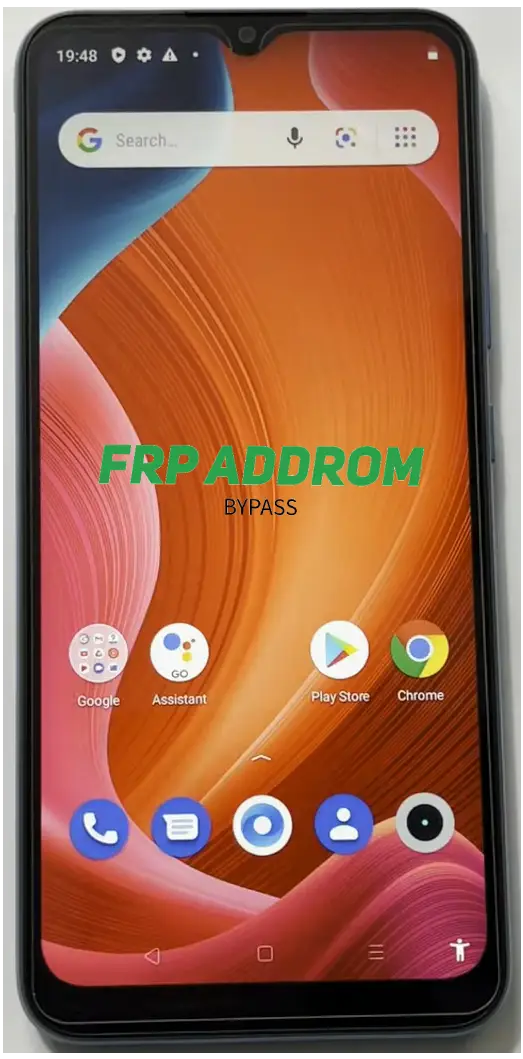
Step 19 — Final state checkpoint
Complete authorized account setup and secure the device with updated recovery details.
With PC
PC-assisted workflows are often used for structured diagnostics and model-specific recovery. They require correct USB drivers, stable connection, and exact model/firmware matching.
DroidKit FRP Bypass Tool Features
- Brand/model guided workflow
- Driver-based USB handling
- Setup-state diagnostics
- Useful for advanced troubleshooting scenarios
- Compatibility differs by firmware and patch level
How to use DroidKit for FRP removal
Use the vendor’s official documentation and on-screen guidance only. Confirm model, firmware version, and data-risk warnings before any operation
Your PC screenshot step blocks (Step 1–10)
Use these as neutral captions under each screenshot:
Step 1 — Tool launch checkpoint
Confirm the correct module is selected for your device scenario.

Step 2 — Start screen checkpoint
Review warnings and required conditions before proceeding.

Step 3 — USB connection checkpoint
If detection fails, change cable/port and verify drivers.

Step 4 — Brand selection checkpoint
Choose the exact brand and variant to avoid mismatched operations.

Step 5 — Configuration checkpoint
Wait for preparation to complete; avoid interrupting the process.

Step 6 — Ready state checkpoint
Proceed only after reading data and risk notices.

Step 7 — OS/version checkpoint
Select the correct Android version shown on the device.

Step 8 — Device-side instruction checkpoint
Follow only validated prompts that match your exact model.

Step 9 — Processing checkpoint
Do not disconnect during active processing.

Step 10 — Completion checkpoint
After restart, verify setup, account status, and device stability.

Media Tek Method
MediaTek-focused tools are discussed for supported chipsets in service scenarios. Compatibility is chipset- and build-dependent, and misuse can cause boot issues.
Key Features of MediaTek Universal Tool
Following are the amazing features of this software.

Useful for advanced technicians
The Addrom Bypass has a simple and easy-to-use interface that makes it accessible to users of all levels.

Broad feature set for supported MTK devices
Addrom is compatible with Android 5.1.1 and higher, but its success rate varies and may not work on all devices or versions.

Driver-based service operations
It is a free tool users do not have to pay any fees to use Addrom, as it is available for free.

Requires careful model/chipset matching
Using the provided shortcuts, you can easily access pre-installed apps and Android system settings, making the FRP bypass process easier for you.

Not guaranteed across all Android builds
Using the provied applications and tools you can easily bypass FRP lock on any Android device.

Regular Updates
Applications will be updated to ensure compatibility with the latest Android versions, so you won’t have to worry about capability issues.
Pros and Cons
Pros
Helpful in specific authorized troubleshooting cases
Supports many models under matching conditions
Cons
No universal success rate
Wrong usage can cause data loss or device instability
Untrusted files increase malware risk
Prerequisites for Using the MediaTek Universal Tool
- Confirm exact model/chipset compatibility
- Install proper USB/VCOM drivers
- Use reliable USB cable and stable port
- Keep battery above 50%
- Back up important data before changes
How to Download and Use MediaTek Universal Tool Free?
Use official vendor documentation and trusted distribution sources. Verify file integrity and avoid modified bundles from unknown websites.
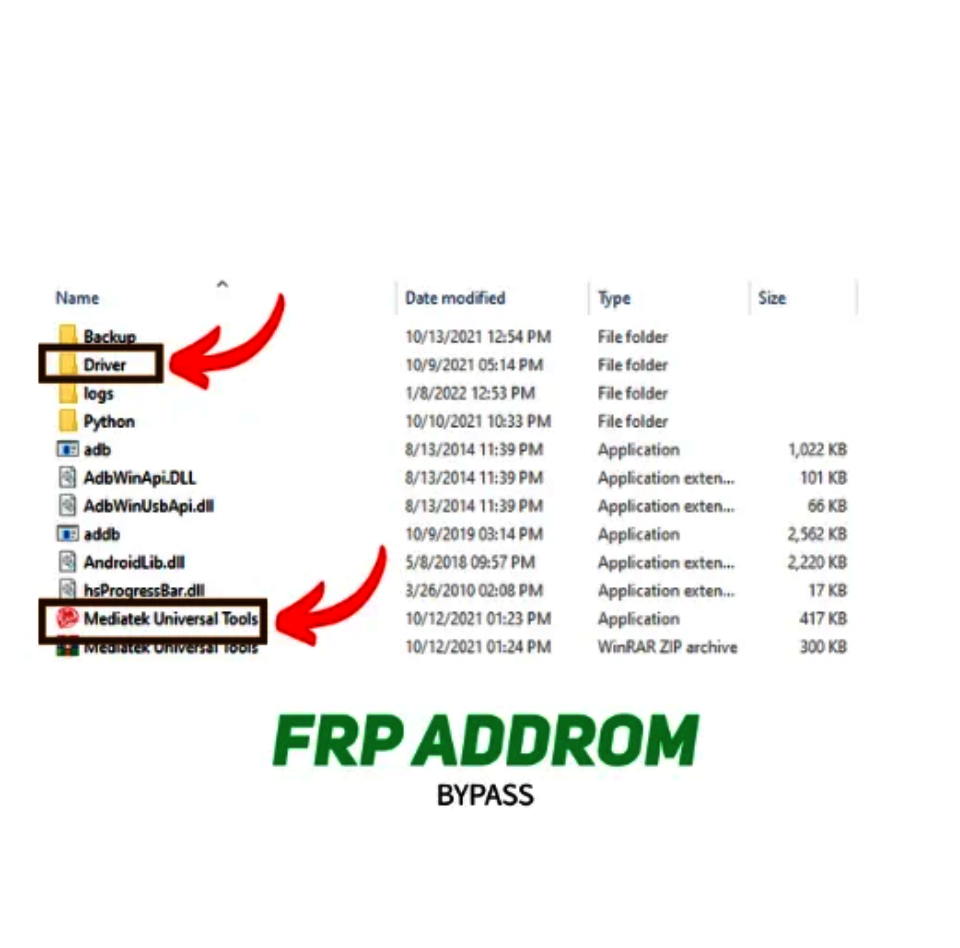
Install the UsbDk driver from the Driver folder by double-clicking it. Open the MediaTek Universal Tool and select the ‘Format Data/Factory Reset’ option from the right-hand menu, then click “Start”.
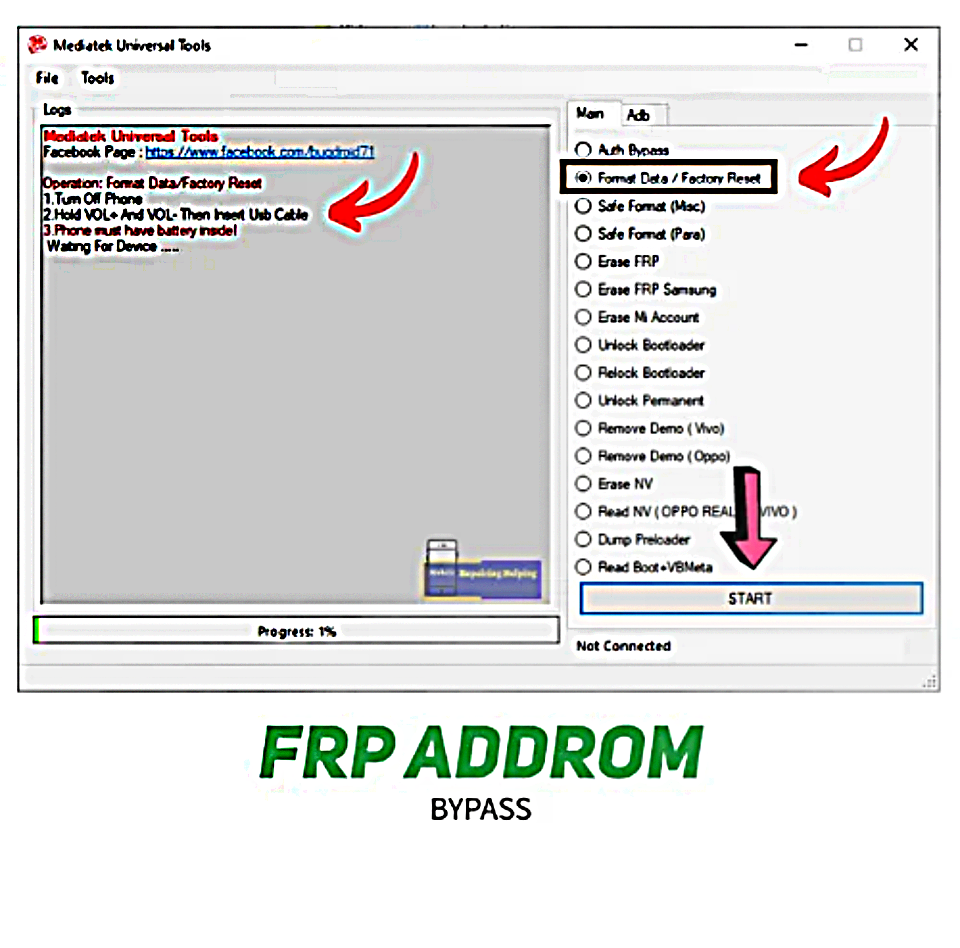
Press the volume up and down buttons to put your device in BROM Mode.
Once your device unlocks, the ‘MediaTek DA USB VCOM (Android)’ port will appear in the device manager. That’s all.
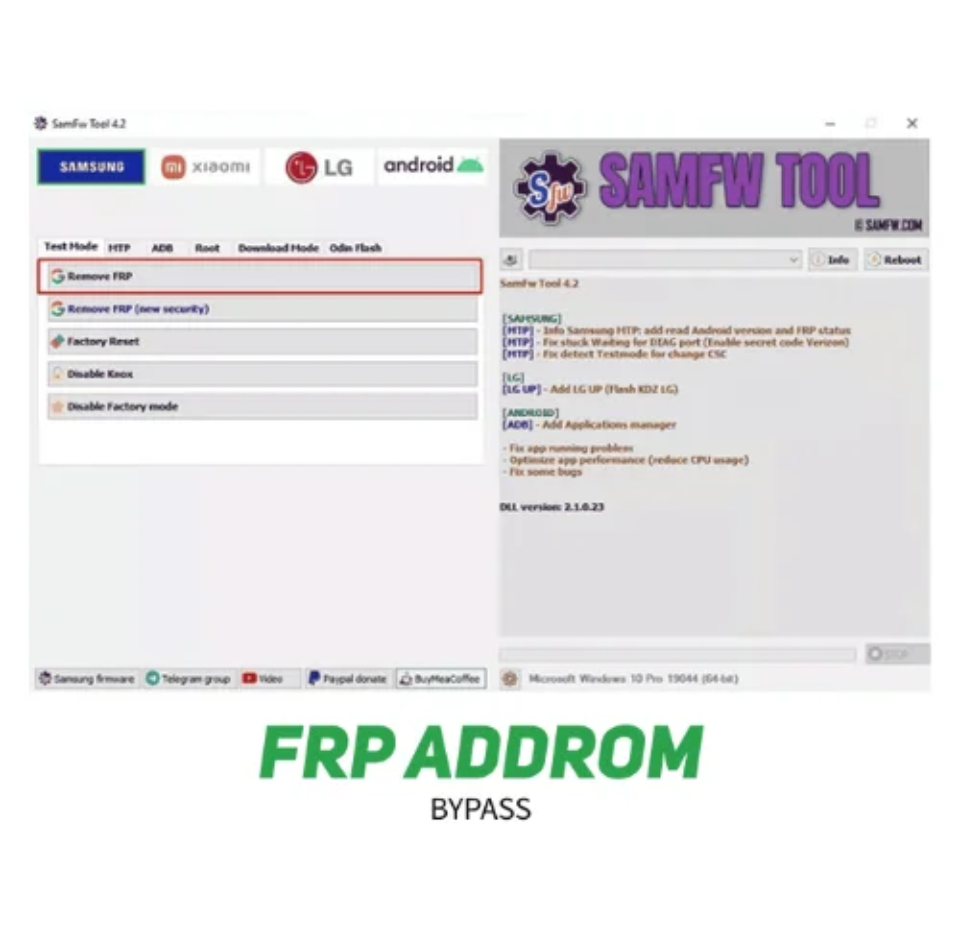
SAMFW FRP TOOL
Another effective FRP unlock tool is the SamFW tool, which reliably unlocks and removes the FRP from your Samsung smartphone.
Key highlights include:
- Free/community availability in some cases
- Wide feature range for supported devices
- Frequent changes as Android security evolves
- Outcome depends on exact firmware conditions
To use the SamFW FRP Tool, follow these steps:
Use only official, model-matched guidance from trusted sources. Confirm legal authorization, driver readiness, and data-risk warnings before proceeding.
There is no single best tool for all devices. The right option depends on model, Android version, and patch level.
In some cases yes, but many modern builds are patch-restricted and may require different recovery paths.
It refers to recovering access when Google verification appears after reset for an authorized user/device owner.
Clear Disclaimer
This content is for educational and authorized device-recovery use only. Do not use it to access devices you do not own or manage with permission. Actions may cause data loss or device issues.